Introduction
Application modernization has become a priority for many companies seeking to improve their operational efficiency, their ability to quickly adapt to market changes and remain competitive in an increasingly digital and dynamic business environment. For many companies, it becomes a challenge to migrate and modernize legacy applications, such as mainframe applications to agile and flexible environments such as the AWS cloud. However, with the tools and solutions that AWS provides, this process becomes much easier.
In this article, I will explain a step-by-step on how to deploy a mainframe application that has already been analyzed and refactored. This implies that the original COBOL code has been transformed into a modern language such as JAVA. We will carry out the deployment in an runtime environment in AWS using the service of AWS Mainframe Modernization.
AWS Mainframe Modernization
In a previously article I gave an introduction to the AWS Mainframe Modernization service, which is basically a set of services and tools designed to facilitate the migration and modernization of applications and workloads running on mainframes to the AWS cloud.
Within this set of tools we have AWS Blu Insights which is a SaaS type tool and helps us not only analyze mainframe applications but also carry out the transformation and/or refactoring of these legacy applications that are developed with the COBOL language to more modern languages such as JAVA, preserving their original logic and functionalities.
When we carry out the transformation and/or refactoring process of these mainframe applications with AWS Blu Insights, we must take into account that the result of this process is the generation of a JAVA application mainly with two layers (Frontend and Backend) and open to a additional layer of persistence where we can make use of other services that AWS provides us such as databases, file storage and queue management services.
Deploying refactored mainframe applications
For this demo we download the example application that AWS has called Planets Demo, this application has already gone through the refactoring process so it is ready to be deployed in the AWS Mainframe Modernization service.
To deploy the application we must follow the following steps:
-
Step 1 – Create an S3 bucket and upload the application
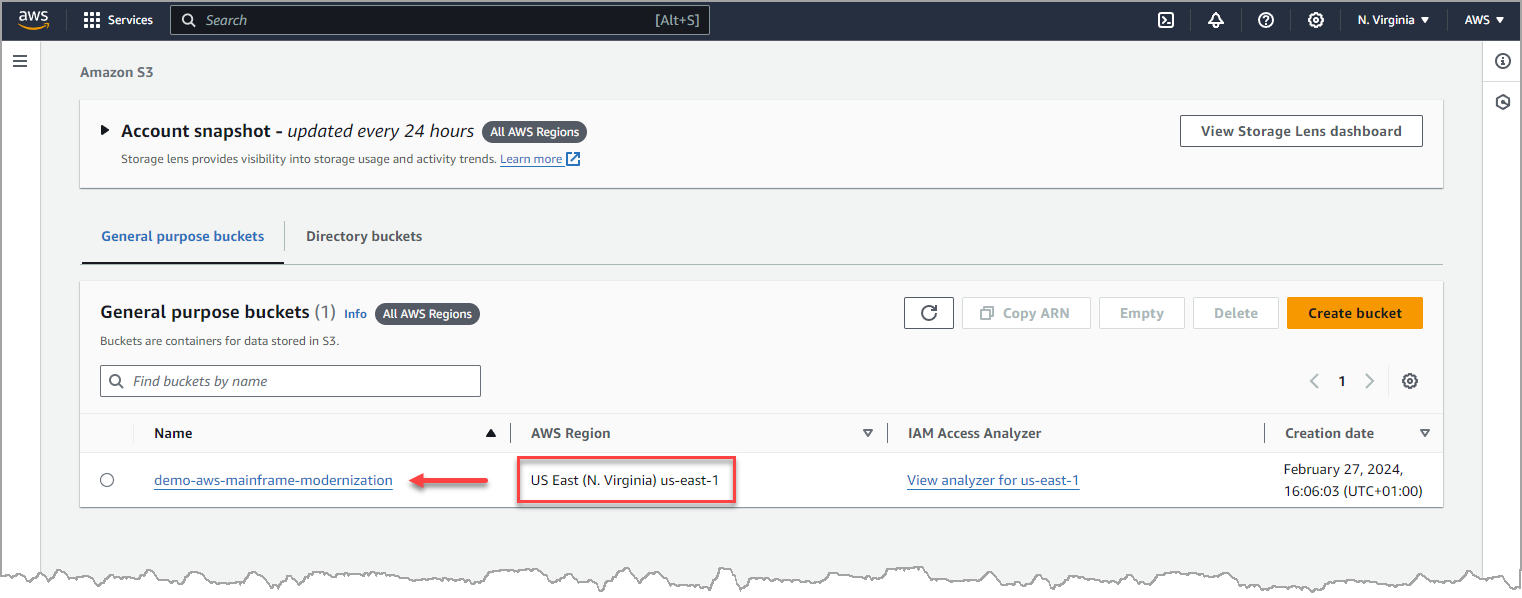
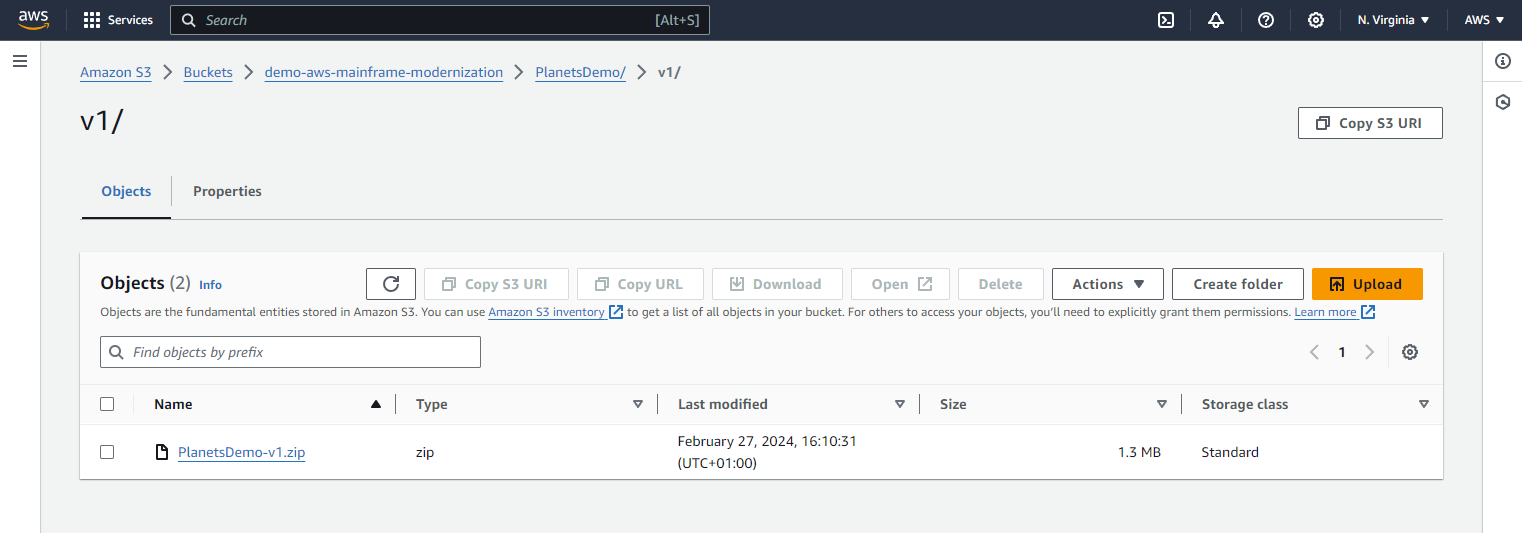
As a first step, must create a bucket in S3 where upload the already refactored application that is in ZIP format so that the AWS Mainframe Modernization service is able to take it and process it within its execution engine.
Something to take into account is that the bucket must be created in the same region where the application deployment in the AWS Mainframe Modernization service will be created and the ZIP file must be stored within a folder.
-
Step 2 – Defining the application
As a requirement to deploy a refactored mainframe application to the AWS Mainframe Modernization service, a JSON file must be configured where the location and configuration of the application is defined, so that the AWS Migration Modernization service takes these parameters and the deployment process runs correctly on the service execution engine.
The configuration is very simple and for this example in the following JSON code we configure the name of the bucket, the path where the ZIP file is located within this bucket and the port where the application will be listened to when the URL is entered in a browser.
{
    "template-version": "2.0",
    "source-locations": [{
        "source-id": "s3-source",
        "source-type": "s3",
        "properties": {
            "s3-bucket": "demo-aws-mainframe-modernization",
            "s3-key-prefix": "PlanetsDemo/v1"
        }
    }],
    "definition": {
        "listeners": [{
            "port": 8194,
            "type": "http"
        }],
        "ba-application": {
            "app-location": "${s3-source}/PlanetsDemo-v1.zip"
        }
    }
}
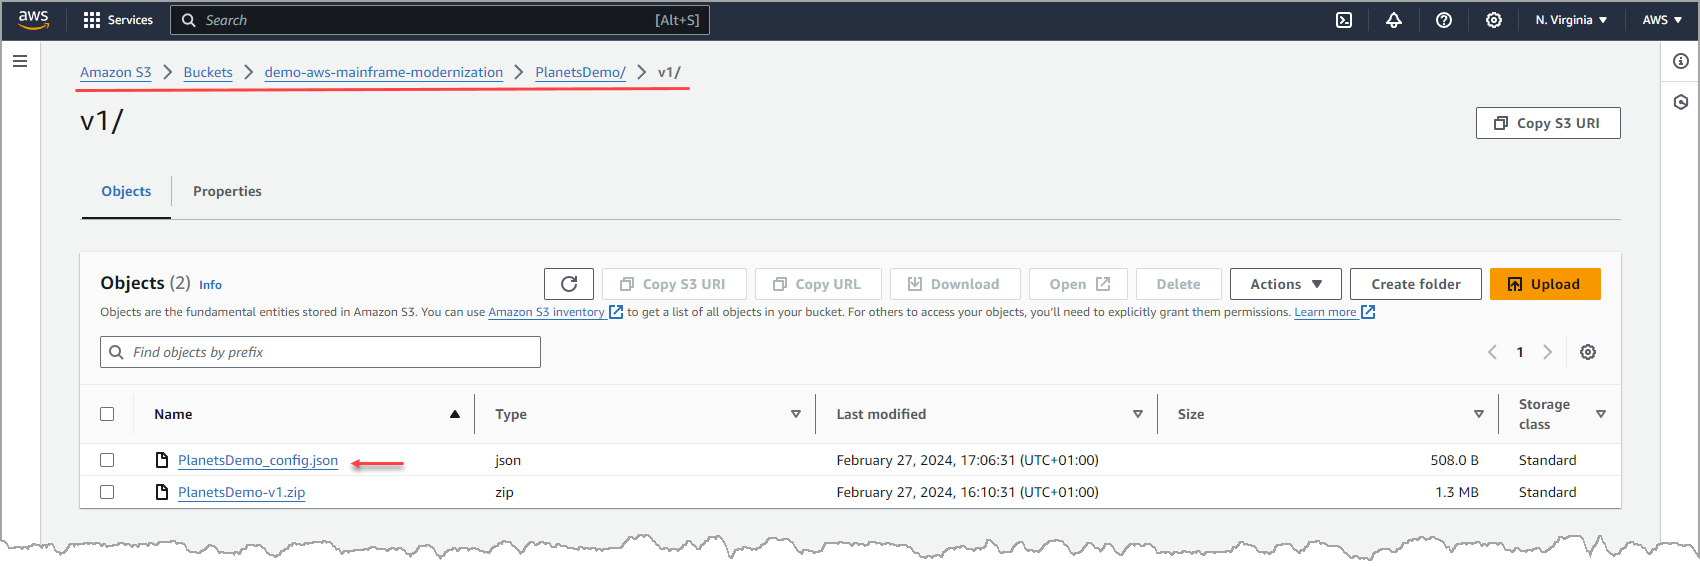
Once the configurations have been made in the JSON file, it is important to upload it to the same folder within the Bucket where the ZIP file has already been uploaded with the refactored application.
-
Step 3 – Creating the runtime environment in AWS Mainframe Modernization
A runtime environment is a comprehensive set of infrastructure resources that includes a runtime engine, specifically designed to host and manage one or more migrated mainframe applications.
To create the runtime environment, the first thing we do is look for the AWS Mainframe Modernization service within the AWS console and there we select the “Refactor with Blu Age” option.

In this demo, the application has already gone through the refactoring process with the solution of Blue Age, what we're going to do now is perform the deployment of the mainframe application in the execution engine. For this we select the deployment option and after the select the runtime environment option.
Now we ask ourselves, what is refactoring? As the service page says “It is the automatic transformation of legacy language applications (e.g. COBOL) into agile services based on Java with AWS Blu Age, taking advantage of the most advanced web frameworks and best practices of DevOps in the cloud.”
We select the deployment option, then “create runtime environment” and finally click on the continue button.
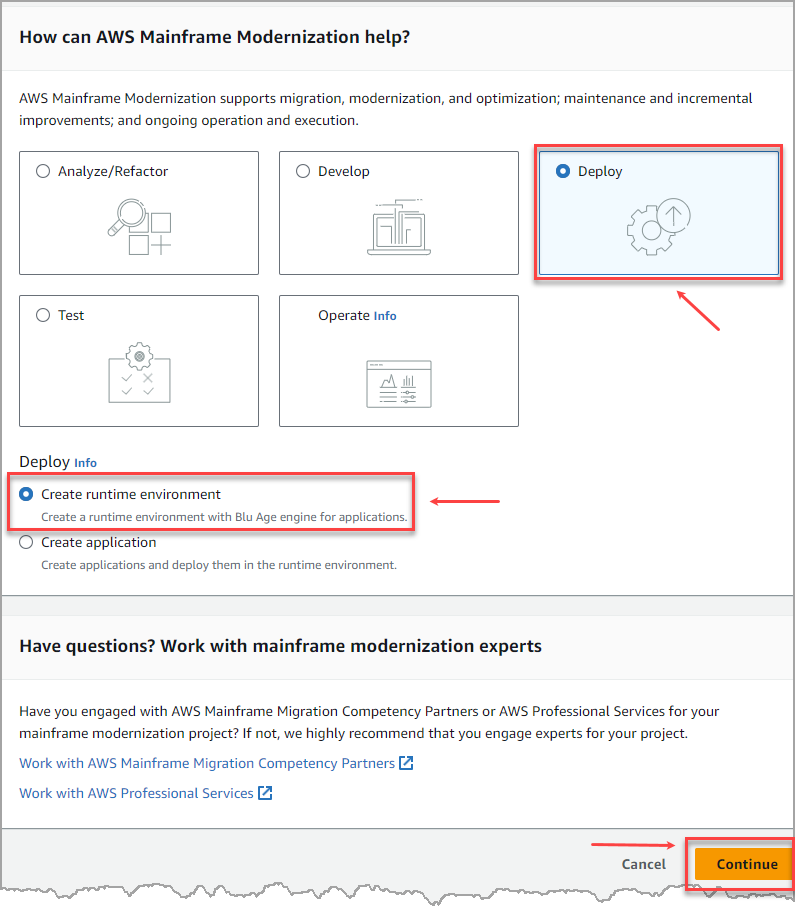
Another way to access the creation of this runtime environment is by entering through the menu on the left, selecting the "Environments" option.

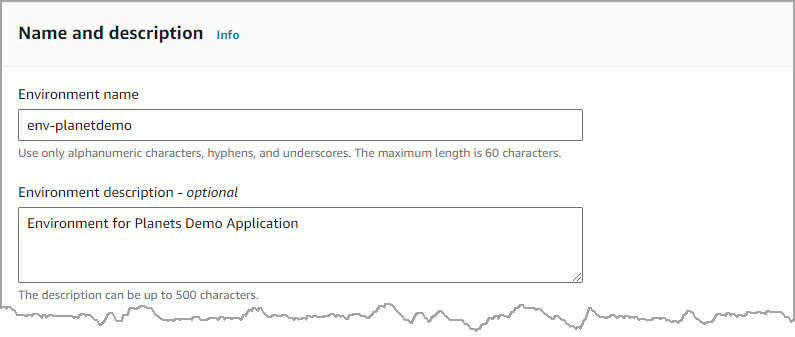
Regardless of the path by which we access to the creation of the runtime environment, the first step is is to specify the basic information, where we give a name and a description to the runtime environment.
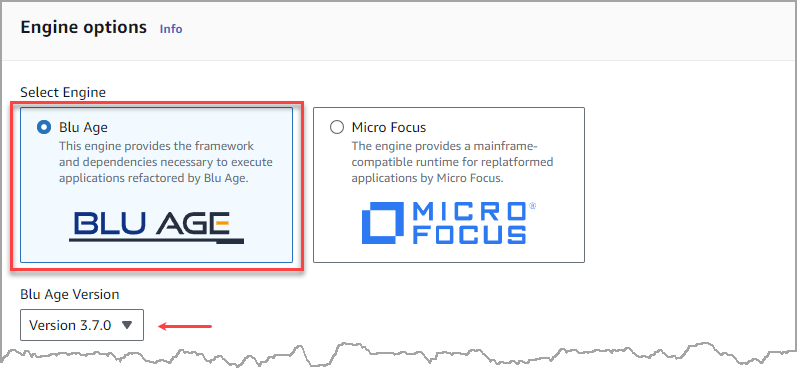
Now it asks us to select the engine, as this is an application that has already gone through the refactoring process with the Blu Age tool, we must select this engine and the version, for the purposes of this demonstration we will select the one that appears by default which is version 3.70, however it is recommended to work with the latest versions that come with many improvements and updates.
At the end of this basic information specification, the same service page indicates that once the runtime environment is created, metrics will automatically be created and logs stored in Amazon CloudWatch. If desired, you can also apply tags.
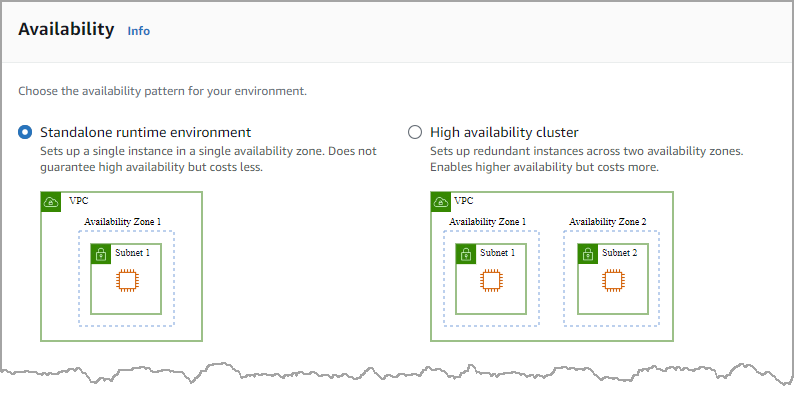
Now we move on to step 2, which is the configuration specification, in this section we configure the availability of the runtime environment, where the AWS Mainframe Modernization service offers two options: the standalone runtime environment and the high availability cluster. In the standalone runtime environment, a single instance is configured in an availability zone, a perfect scenario for demos like this and to test mainframe applications already transformed and refactored, in the case of the high availability cluster it is recommended for production environment scenarios where we will have redundant instances in two availability zones, of course this scenario is more expensive.
For this demo we will select the standalone runtime environment option.
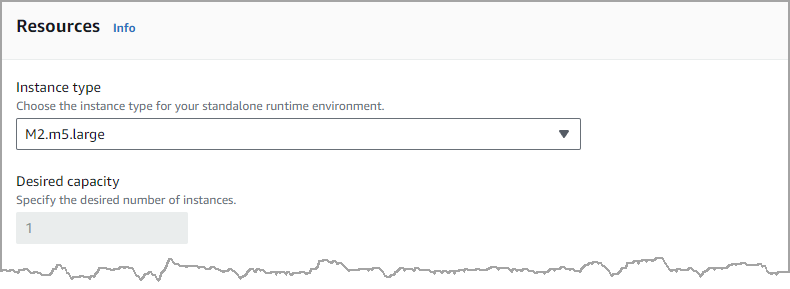
Another section is the resources part where we select the type of instance we want to be deployed for our runtime environment. AWS Mainframe Modernization offers a series of instance types that we can use depending on the type of workload or application that we are going to process in the runtime engine. For this demo we will use the smaller one, which is the M2.m5.large instance.
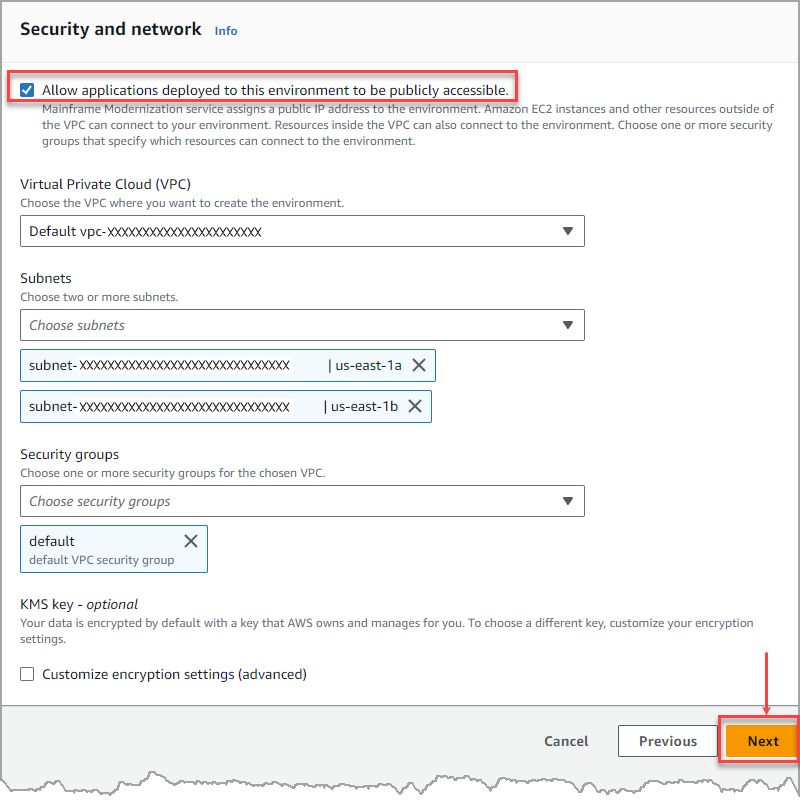
Finally, we move on to the security and networking section, where we select the VPC, subnets, and security groups we want to use to deploy these instances. For this demo we selected the option "Allow applications deployed in this environment to be publicly accessible", this option assigns a public IP address to the application so that it can be accessed from a web browser.
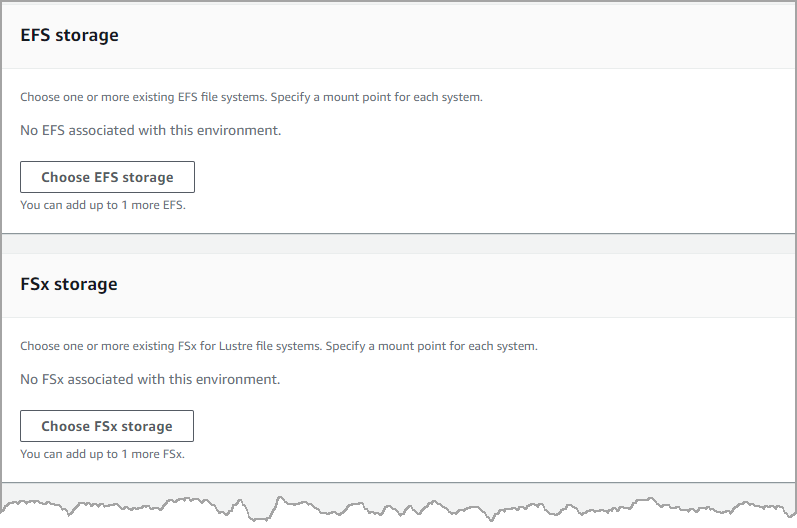
The next step is to select the storage. If our mainframe application requires storage such as EFS or FSx, we can configure it in this option. For this demo these types of storage will not be necessary.
Now we move on to scheduling maintenance, as AWS Mainframe Modernization is a managed service, AWS is responsible for performing maintenance and applying updates, however we must select when these maintenance windows should be scheduled so as not to affect the operation of the mainframe applications that are already deployed. For this demo we will select the no preference option.

To finish the creation of our runtime environment, a summary of the selected configuration is displayed to make a final check before creating the environment. In this demo the creation of the runtime environment took approximately 4 to 5 minutes.

-
Step 4 – Create the mainframe application
In this step what we do is configure the mainframe application that we want to deploy.

Step 1 of this section is the specify basic information, where we give our application a name, a description and select the type of engine which in this case is Blu Age.
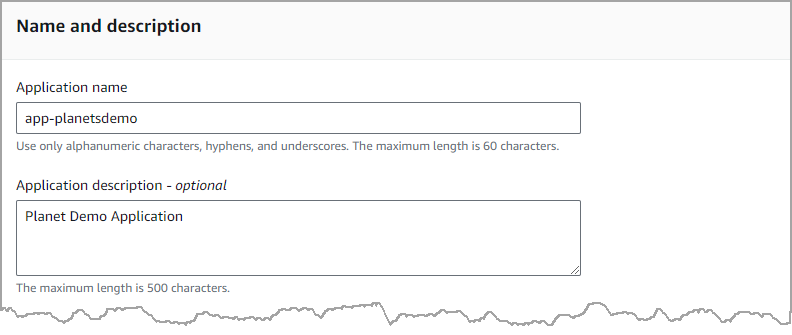
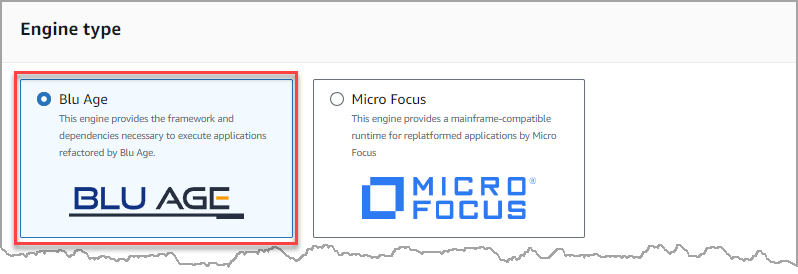
Additionally, other configuration options are offered, such as adding a KMS key, adding an IAM role and tags to assign to these resources.
Step 2 of this section refers to the specify resources and configurations, this step is key to configure properly, because the correct configuration will depend largely the sucess execution of the application. Here we simply copy the JSON code we set up previously where we defined the bucket and the path where the ZIP file is located with the refactored mainframe application or we simply select the path of the bucket where this JSON file is located.
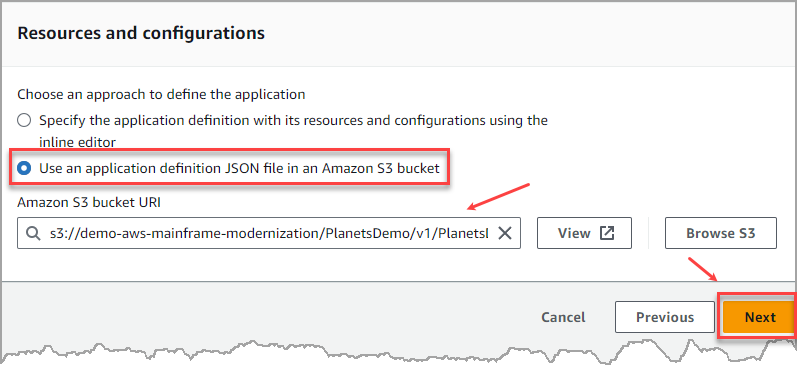
The last step in this section is reviewing and creating the mainframe application configuration. For this demo this process took approximately 30 seconds.

-
Step 5 – Deploy the mainframe application
Having already created the runtime environment and the configuration of the application, we would only need to deploy the application refactored with Blue Age in this runtime environment that we have created and configured.
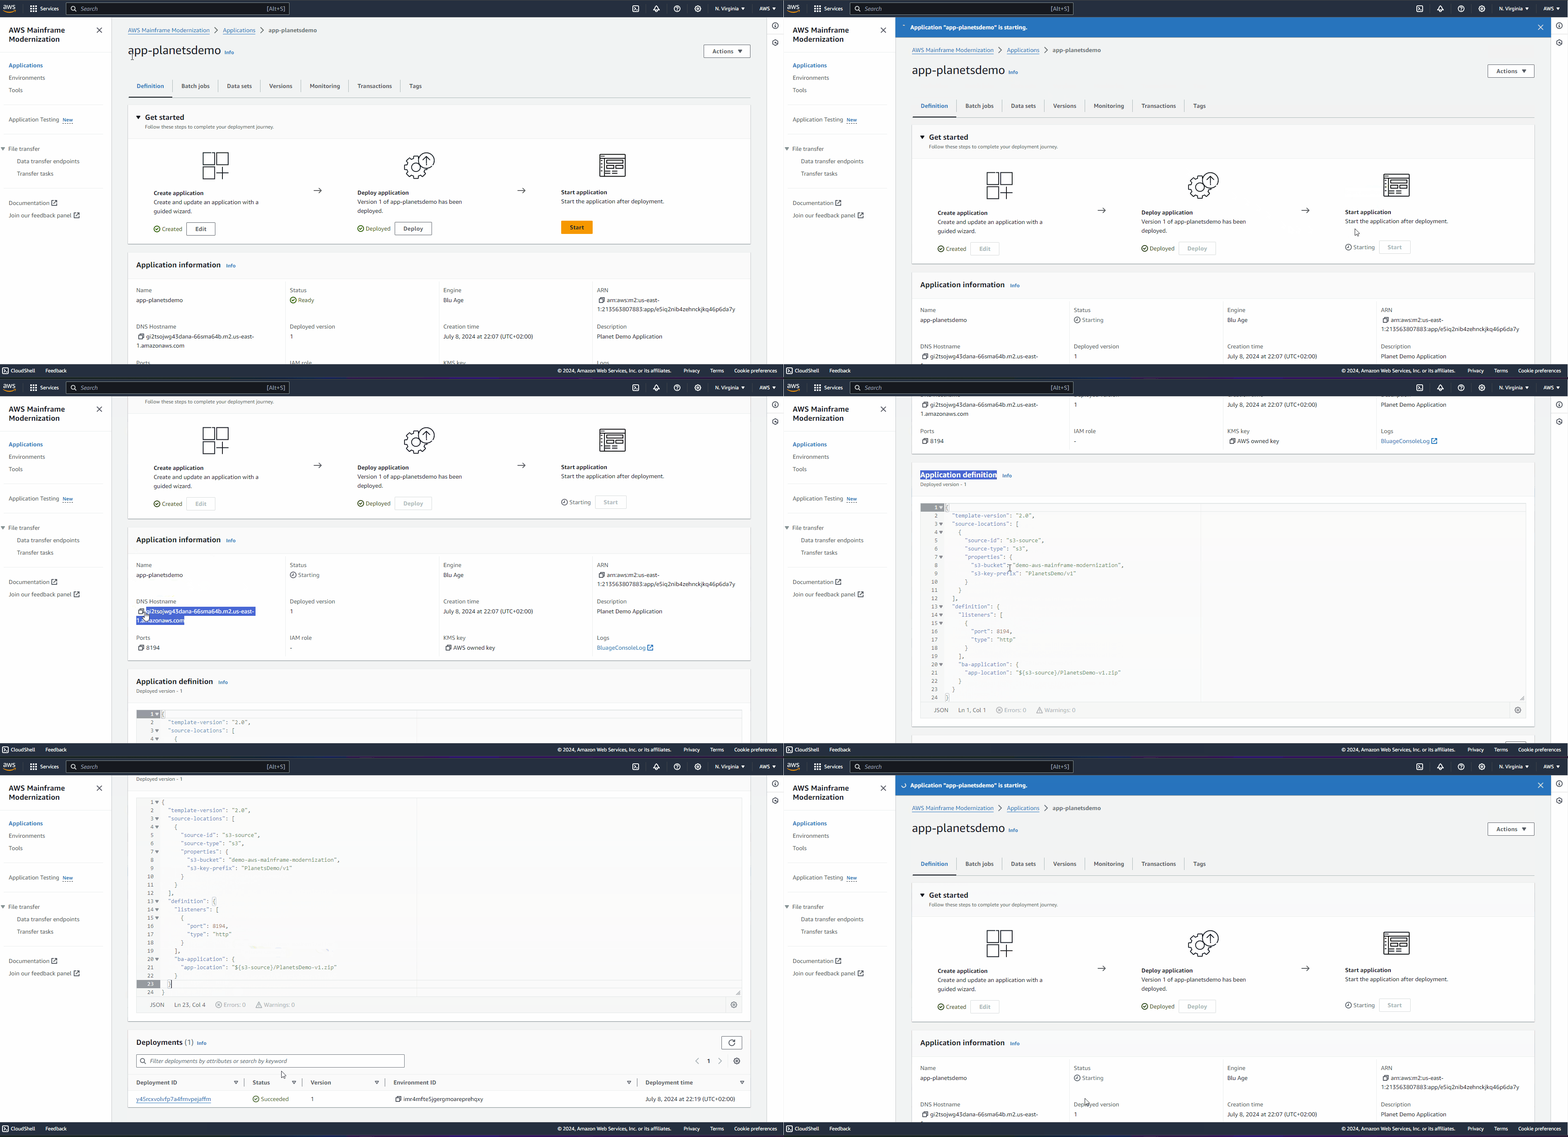
To access the deployment configuration we simply click on the name of the application configuration that we have just defined for this demo "app_planetsdemo" and click on the Deploy button.
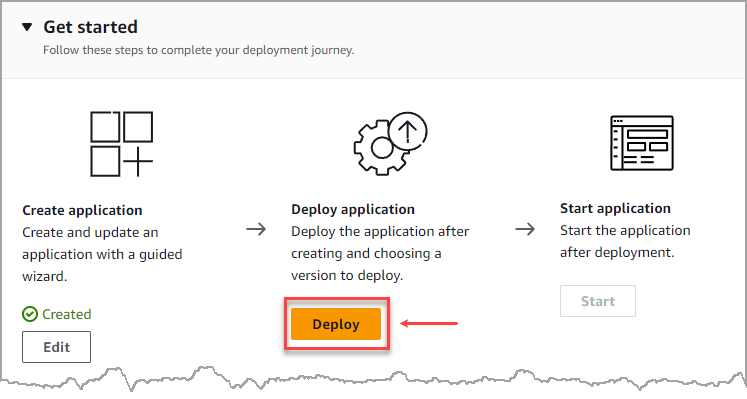
In this step all we do is select the version of our mainframe application and the runtime environment where we want to deploy it.
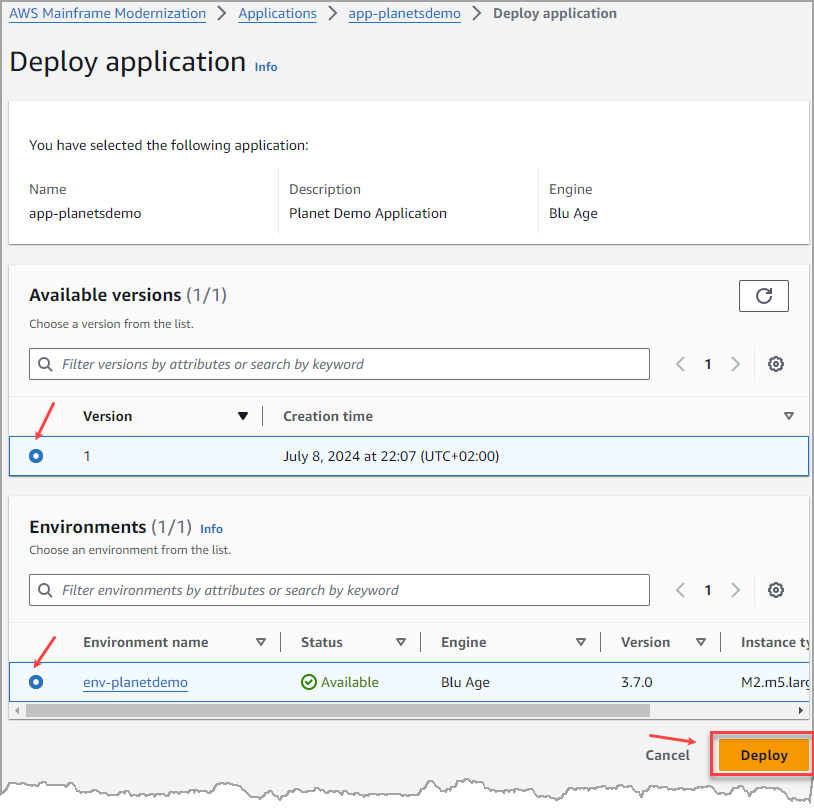
For this demo, this process took approximately 15 minutes to deploy the mainframe application.
-
Step 6 – Run and test the application
After having completed all these steps and their respective configuration, we proceed to run and test the AWS Planets Demo example application. We are going to notice something interesting and that is that since the mainframe application has been refactored, modernizing the code from COBOL to JAVA, we will enter to the application in web mode through a browser. But before running the live application, we must start it and once started we go to the information section of the application, where we can see that a DNS Hostname has been configured and assigned, which is the address that we must enter in the web browser.
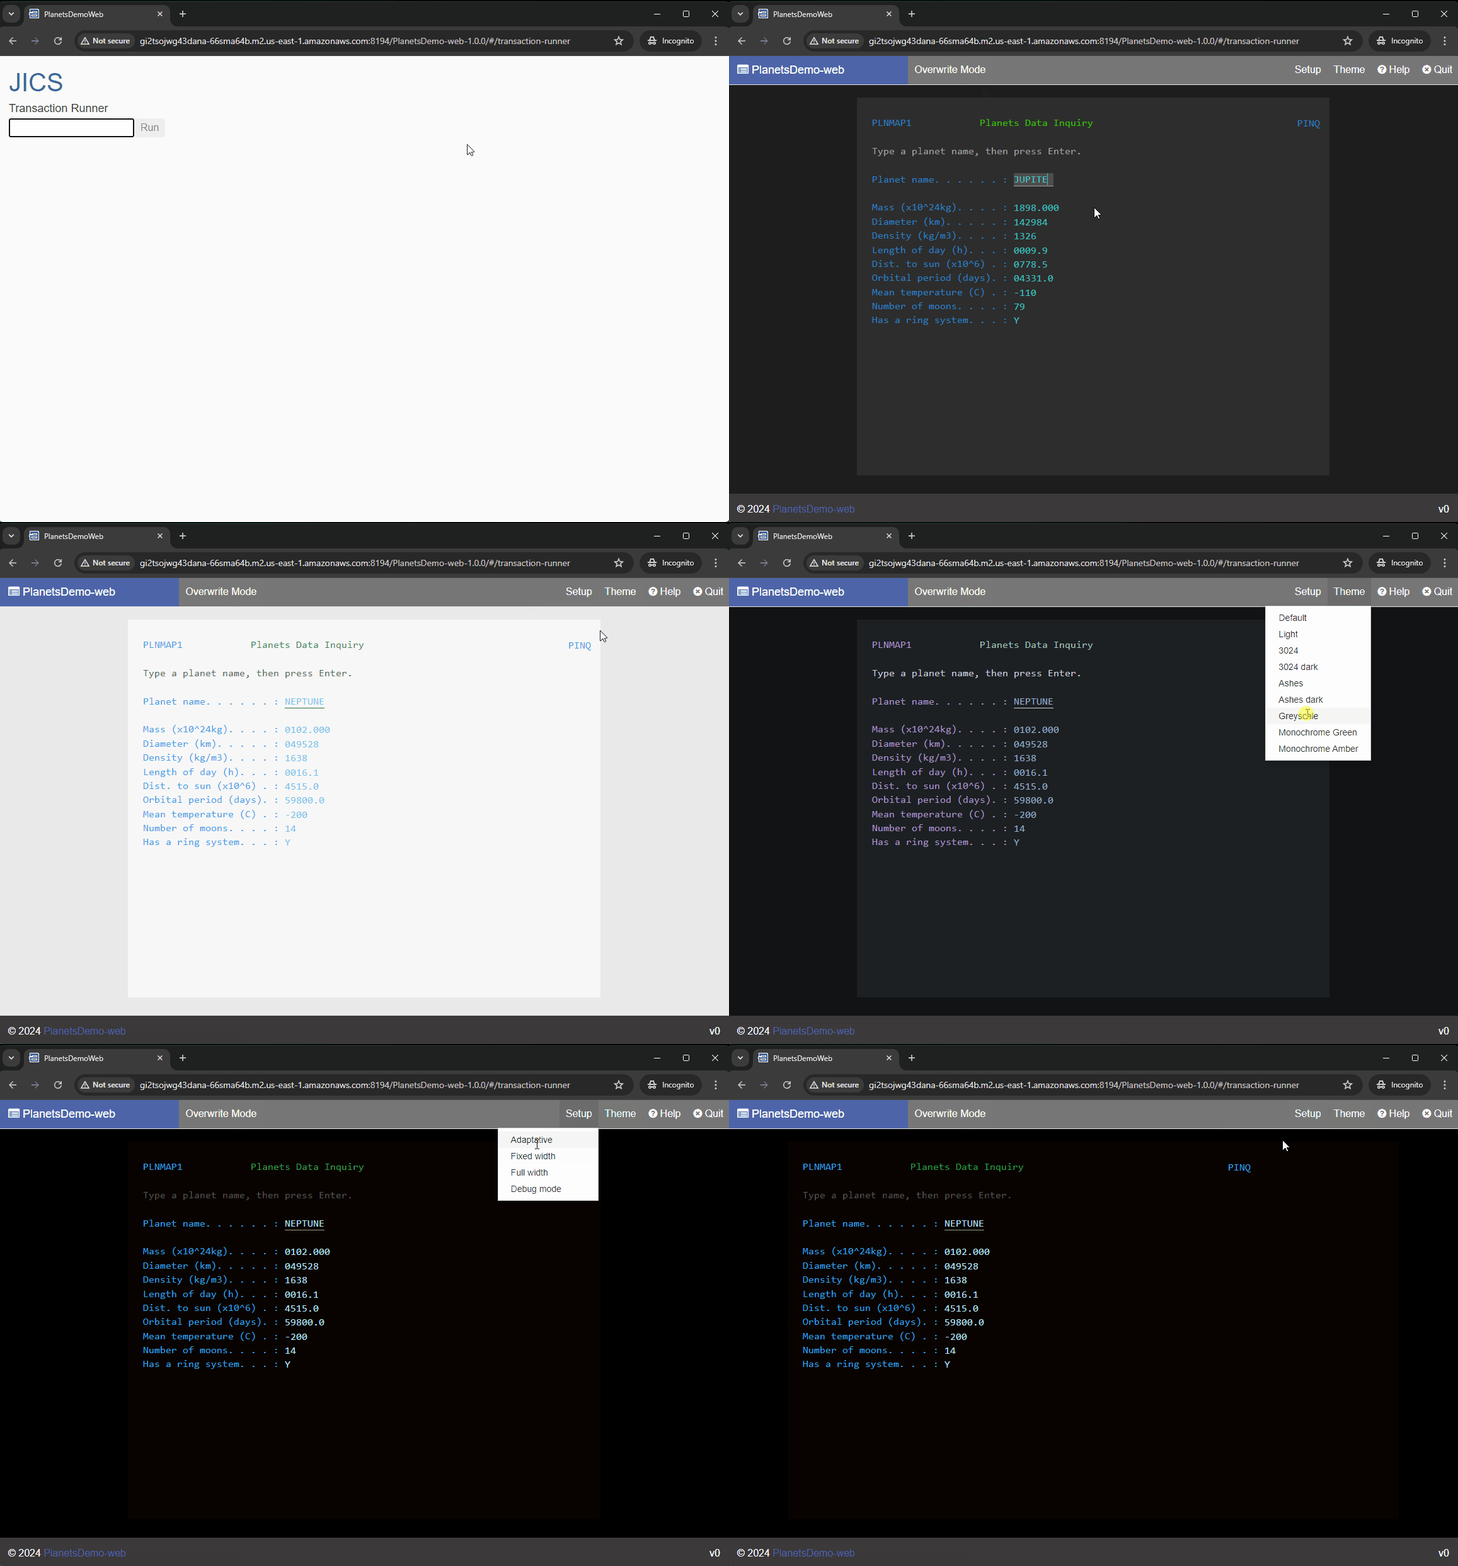
For many, this application will remind them of times of the past, but now they are a reality to have them in the AWS cloud and in its AWS Mainframe Modernization service. This application is very simple, we simply type in a name of a planet of the solar system and it immediately brings us information about the planet we have searched. As the application runs in a web environment we can change the appearance of the screen.
In the browser we enter the following URL: http://{DNS hostname}:{port}/PlanetsDemo-web-1.0.0/
Now let's get to the action!!
-
Step 7 – Mainframe Application Monitoring
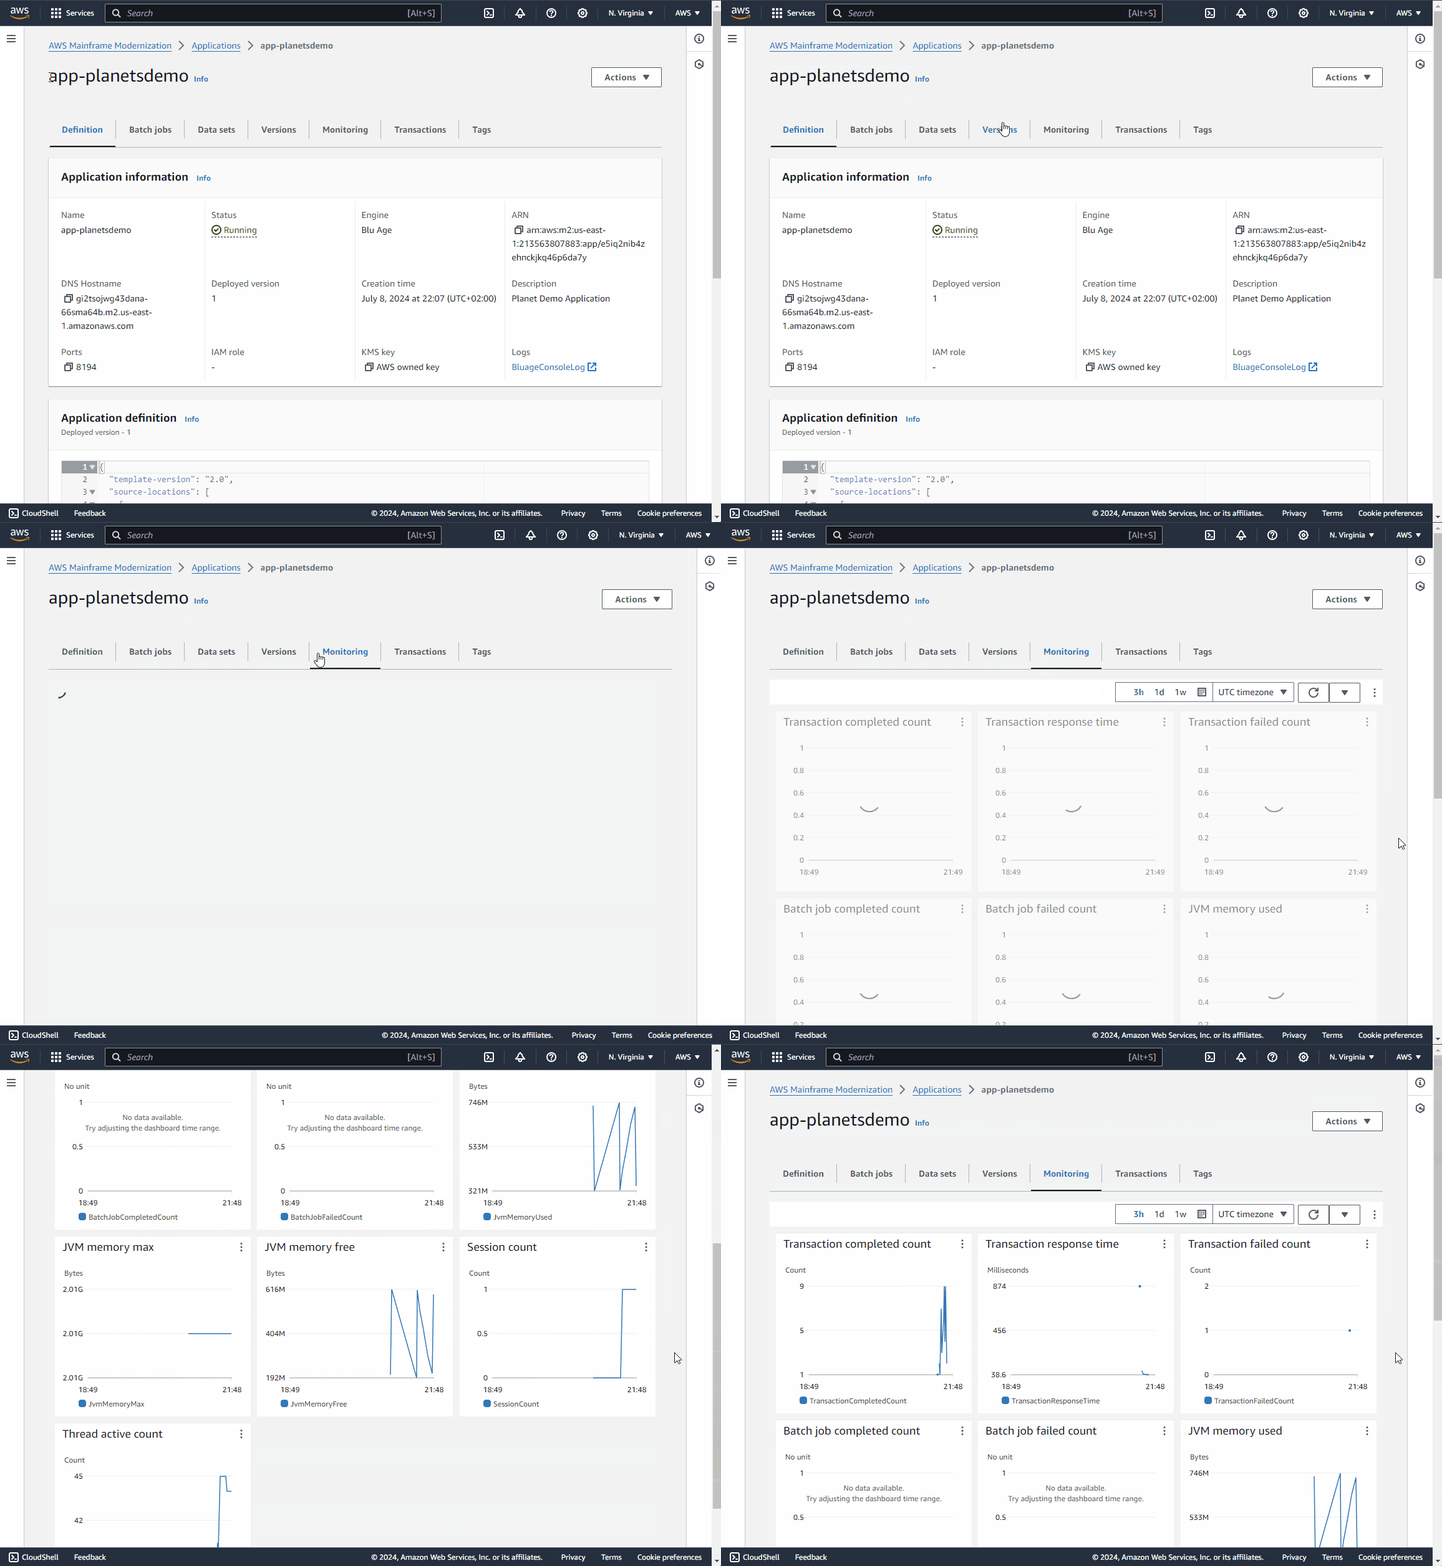
Within the application section, several tabs appear with certain information and one of them is the monitoring tab. When we enter this, different graphs are shown with metrics that measure the performance of the infrastructure and the mainframe application.
Conclusion
Adopting AWS specific tools and services, such as AWS Mainframe Modernization, eases the transition process, ensuring that refactored mainframe applications retain their optimal functionality and performance. Modernizing mainframe applications on AWS not only is a technological evolution, but also an opportunity for companies to innovate and improve their operations, while maintaining their relevance and competitiveness in a constantly changing business environment. AWS provides a wide range of resources and tools that not only simplify this process, but also empower business transformation through mainframe application modernization.
Resources
Review the following resources for learn more about the AWS Mainframe Modernization service:
- AWS Mainframe Modernization
- YouTube – Introduction AWS Mainframe Modernization
- Blog – AWS Mainframe Modernization
- AWS Mainframe Modernization User Guide
- AWS Mainframe Modernization Refactoring with AWS Blu Age
- AWS MAP for Mainframe
Hope will be useful.
Best Regards,
Follow us:

